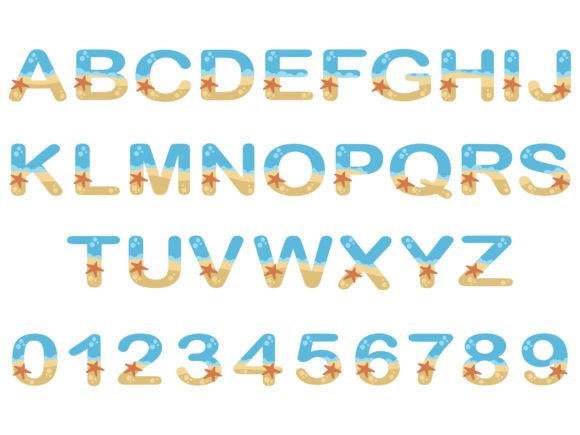
Beach Bubble Alphabet for Embroidery Projects: A Designer’s Perspective
What Works Best?
- Tote Bag Design: Especially when printed or stitched alongside other beach-related graphics.
- Sweatshirt Embroidery: Great for names, short phrases, and casual messaging.
- Baby Embroidery: Perfect for initials, birthdays, or nursery decor accents.
- Embroidered Patch: The rounded, bouncy style works especially well on denim or canvas patches.
- Tea Towels & Pillow Covers: Adds a fun touch to home décor items, particularly when using multiple colors or metallic threads.
- Printable Mockups: Ideal for showcasing your own designs or selling digital embroidery kits.
Where to Be Cautious
On small hoop sizes, the design’s detailed curves can become compressed or lose their charm. If you're working with tiny monograms or name tags under 2 inches tall, the softer lines may not stitch cleanly, leading to uneven or distorted results.
Textured fabrics such as corduroy or flannel can cause stitch lines to bunch or flatten. You’ll need to adjust stitch density and possibly add extra stabilizer to keep the design looking crisp.
I also noticed that on thin or stretchy materials, like rayon or jersey knit, the design requires careful tension control and a good backing material. Otherwise, the stitches may pull or distort after washing.
If you're considering using this on dark fabric, make sure your thread colors contrast well. Lighter shades will pop better, but if you go with darker threads, they might get lost in the background. Testing with black-and-white mockups before stitching is a smart move here.
And finally, avoid using this design on curved surfaces like caps or hats unless you're prepared to do some manual adjustments. The curvature of the cap can warp the bubble-like effect, making the letters appear misshapen.
Design Notes for Embroidery Success
- Test on scrap fabric: Especially important if you’re using it for commercial embroidery or high-value handmade products.
- Check thread color contrast: Use a swatch board or photo editing tools to preview how the design will look on different backgrounds.
- Review stitch density: Adjust as needed based on fabric type and desired outcome. Thicker fabrics may need looser stitches to prevent puckering.
- Confirm hoop size: Make sure your design fits comfortably within your hoop dimensions without stretching or cutting off important elements.
- Inspect small details: Look at corners and curves under magnification to ensure they stitch smoothly and don't snag.
- Use proper stabilizer: Tear-away or cut-away options work best depending on the fabric weight and stretch.
- Compare light and dark fabric backgrounds: This helps determine visibility and overall impact.
- Check whether the design works for both personal and commercial projects: Licensing terms should be confirmed before selling finished items or digital products.